Your Personal "X-Ray" Tutorial: (procedure was written for Photoshop users)
Step 1 - selecting your photo
You will need a decent photo. Sheer is not the only characteristic the photo must posses, but it is an important one. Black sheer, in my experience, will not work, at least not nearly as good, but some people have been able to get some decent results.
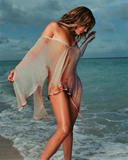
The material itself doesn't really matter as you can see from the examples below, as long as it's sheer and a light colored material, you should be fine. Remember, you are exposing the darker/lighter tones from the flesh underneath the material... so make sure you have something to work with.
One more thing; You will notice that most people,(like myself), have prominently "x-rayed" the chest area, this is because the clothing is pressed tight against the flesh. Areas like folds or empty spaces will have much less to zero results.
Step 2 - selecting the area to "X-Ray"
Try to only select the area in which you are editing, don't do the entire image or it will look terrible. For this you will need to use the "Magnetic Lasso" tool and outline the specified area. IE; if you're "x-raying" the chest area, select the entire top with the magnetic lasso... not just the tits.
Once the area has been selected, right click within the outlined area and choose "Layer Via Copy." This will make a new layer from the selected portion. You may also choose to "Feather" the outline... but it's not necessary.
Step 3 - Obtaining "X-Ray" effect
Next, go to "Image" --> "Adjustments" --> "Levels." From there you can play with the slide bar to achieve the best effect. I can't really explain this part further as every photo is different, especially light and/or dark clothing.
From here you can start to get artistic, play with other levels like, colour, contrast, brightness, and most importantly the "Dodge" and "Burn" tools to perfect it. But be fore-warned!... do not become dependent on the dodge and burn tools... you will ultimately ruin the image by "drawing" on it. Only use it to gently darken the shadows that are already there.
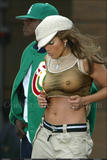
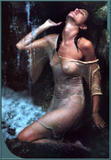
That's pretty much it. As i said, some photo's will work better than others. It has a lot to do the the lighting within the photo itself as well. Yellow lights or natural light will create different outcomes, as will the clothing... Here are some examples that i've done:


32 comments:
Hey thanks for the cool tutorial. I love doing adobe stuff and this stuff is pretty fun. I guess the key seems to be that you have to go darker then anything.
Keep up the good work.
thanks rusty, it was a basic step-by-step, but glad it helped.
thanks for the tutorial
http://bundybabes.blogspot.com
where is dodge and burn, is this photoshop?
yes, i wrote this for Photoshop users.
Dodge and Burn and tools that should be located in your regular tools list, usually in the left hand window. the Dodge lightens the area while the Burn darkens it.
can u give a step by step example i can't re-create that hillary swank for nothing!!!
Is there a way to do this in GIMP?
A cool tip maybe naughty, but I wouldn't call perverted. I just wish some others would stop and read... The author said from the start "For PhotoShop users" - Reading the tip, accomplished users of other programs should be able to figure out a method themselves if it were possible.
so this means its only for celeb pictures?
it can be used on any photo... this is a celebrity blog, so i did celebrities as examples, but any photo with the above characteristics will work.
if you're having trouble grasping the concept, just think of a photographer's flash bulb. it has virtually the same effect on sheer/or somewhat sheer clothing, it almost completely makes them see-thru. well, thats the effect you're trying to schieve by adjusting the levels... it's literally just a manipulation of light. then you can use other tools to "enhance" the x-ray effect.
Hey this is really cool - we need more of these pictures!
i just cant get this to work, could you make a step by step example? thnxxxxxx
I tried to do it in Paint Shop Pro, but I am not good with layers and couldn't make the effects work.
Ah I know already I'm deaf guy graphic designer. About 2 year ago. I got a lot see-though wear all a girls "google.com" image. I got already in jessica alba close-up bottom her pertect tits. hahahaha you were guys miss see-though boob girls :-)
amazing work ECW!
hi i am having trouble grasping this. so if i send u a couple pics could u enhance them for me and send them back.. greatly appreciated.. :)
Thank you Guys for that great Tut. Works like a Charme. I did post the german translation (kind of) on my blog, credits to you Guys.
This is the greatest use of Photoshop that has ever been discovered.
Great job ECW, keep it up. I'd LOVE to see more!
D
Good tutorial - for my part, I've found that using the lasso tool to select the area for x-raying leaves an edge that is too sharp. I've had good success using "quick mask" so paint the area I want to work on. Using the paint brush to select gives the selection a fuzzy edge which helps make the final image look more cohesive. Once you exit quick-mask, just Ctl+Shift+I to invert selection, then proceed with the titorial as ECW wrote it.
------------------------------
Good tutorial - for my part, I've found that using the lasso tool to select the area for x-raying leaves an edge that is too sharp...
------------------------------
well, that's why i said you can use the 'Feather' option. once you have the area selected with the 'Magnetic Lasso', right click and choose the 'Feather' option(usually 1 or 2 is fine) - that will soften the edges dramatically and blend it very nicely.
try it out.
does anyone have a tutorial for corel paint shop pro x??
is it possible to post a step by step tutorial? i really cannot achieve the same results you guys... dunno y...
Hi, could you show me what you get with 2 pictures i'd give you, hope you get better effect than me:p
great tut but u think its possible to upload the pdf file so we can see an example of what u did?
Very nice tutorial... it's much easier than I anticipated thanks to you. :D
Wonderful blog.
Heh,I have several female friends taht i'm going to try this on. Much fapping will proceed.
I don't see Image Adjustment Layer anywhere.
can i send you an image and see whaat you can do? I'm not very good at it
a simple app for this kinda shit would be ideal
Just recently discovered X-Rays thanks to you and everyone else over on Phun. I started a blog of my own to display my work. If you feel like looking, check it out and let me know what you think.
Thanks and great work!
Celebrity X-Rays
Photoshop isn't enough to get good results.
You can check this web:
http://www.retocarunafoto.com/rayosx.php
Search for the Jennifer Lopez example in the web... it's the next level of transparency... :-P
Post a Comment